1.2. Device Encryption Settings - System Settings
Device Encryption Detected
If you are installing RestoreX360 Lite on your computer and if you see this message, it means Device Encryption is enabled.
To proceed with the installation, you will need to disable Device Encryption.
Why You Need to Disable Device Encryption When Installing RestoreX360 Lite
RestoreX360 Lite interacts directly with your system’s storage at a low level to perform functions like backup, recovery, or data restoration. When Device Encryption (such as BitLocker) is enabled, it restricts access to certain disk areas for security reasons.
To ensure the software can properly read, write, and manage data on your drive, Device Encryption must be turned off temporarily. This allows RestoreX360 Lite to function correctly and perform its tasks without being blocked by encryption protocols.
Follow the steps shown below to disable this setting. We have included images to help guide you through the process easily.
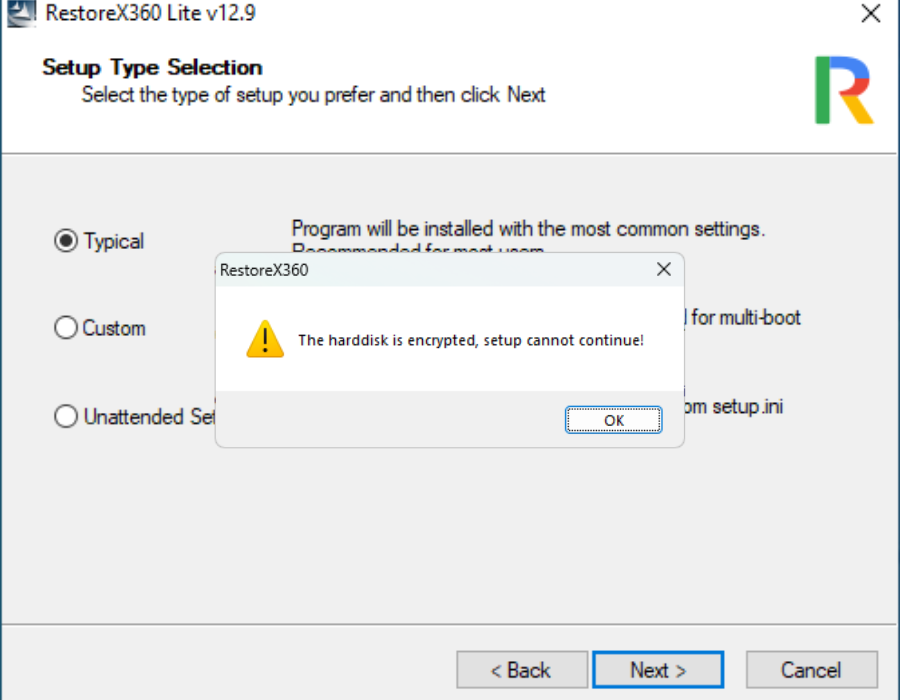
If you see the "Hard Disk is Encrypted" popup, it means you need to disable the Device Encryption settings.
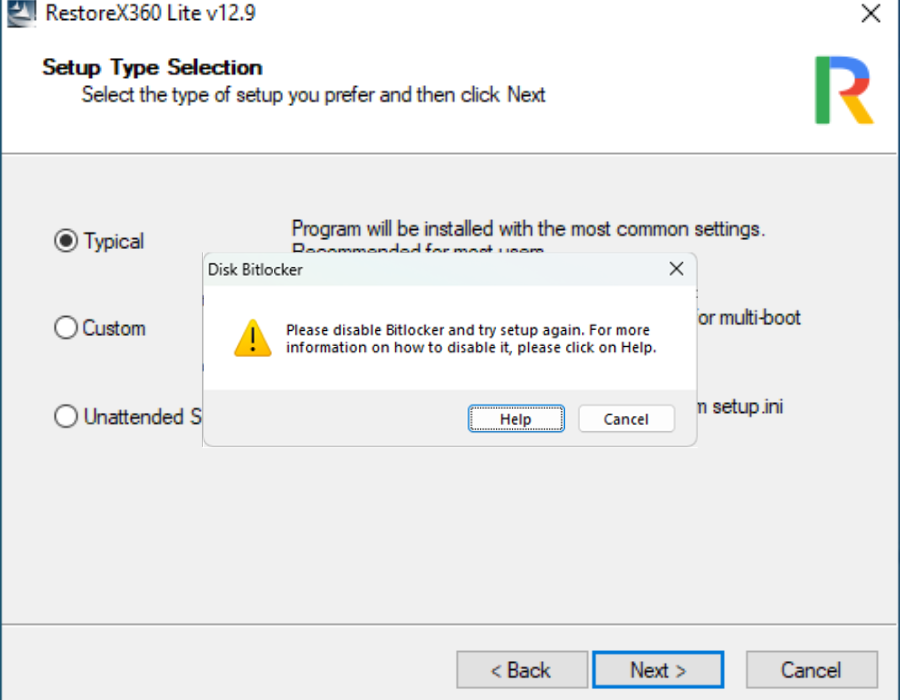
BitLocker Detected
If you see a "Disk BitLocker" popup during installation, please click Cancel on the BitLocker prompt.
You should also cancel the RestoreX360 Lite setup at this point.
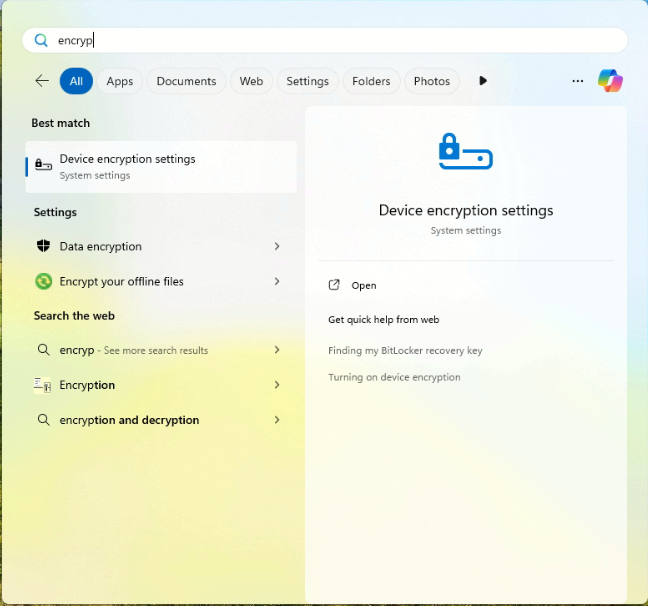
Click on the Start menu and type "ENCRYP" in the search bar.
From the search results, select "Device Encryption Settings" to open the relevant options.
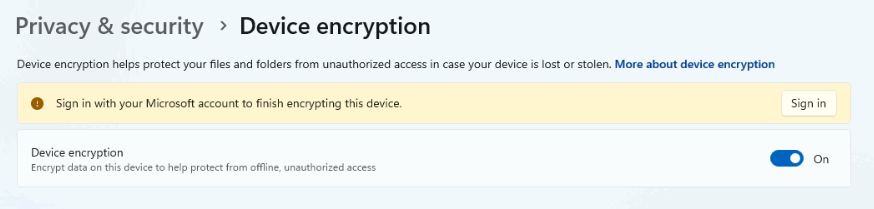
You will see that Device Encryption is set to "On".
To proceed, you need to turn it off.
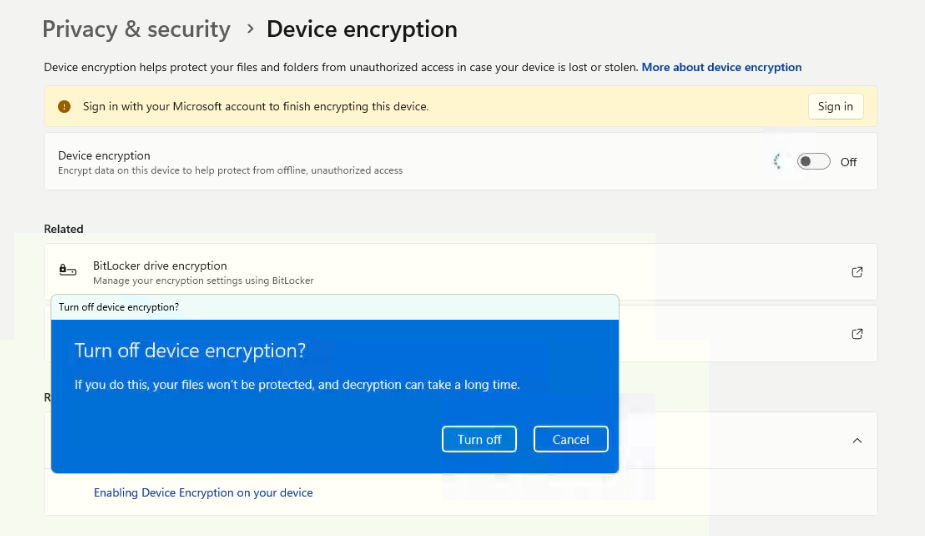
When you click "Turn Off", a confirmation popup will appear.
Click "Turn Off" again in the popup, and then wait for the process to complete.

Please wait - you will see a blue progress line, which indicates that Device Encryption is being turned off.

When you see the status as "Off", it means Device Encryption has been successfully disabled.
You can now proceed with the installation of RestoreX360 Lite.
Go to the setup.exe file, double-click it, and follow the on-screen instructions to complete the installation.